
Turn FRP Rooftop Walkway Photos into a Reviewable Route Plan
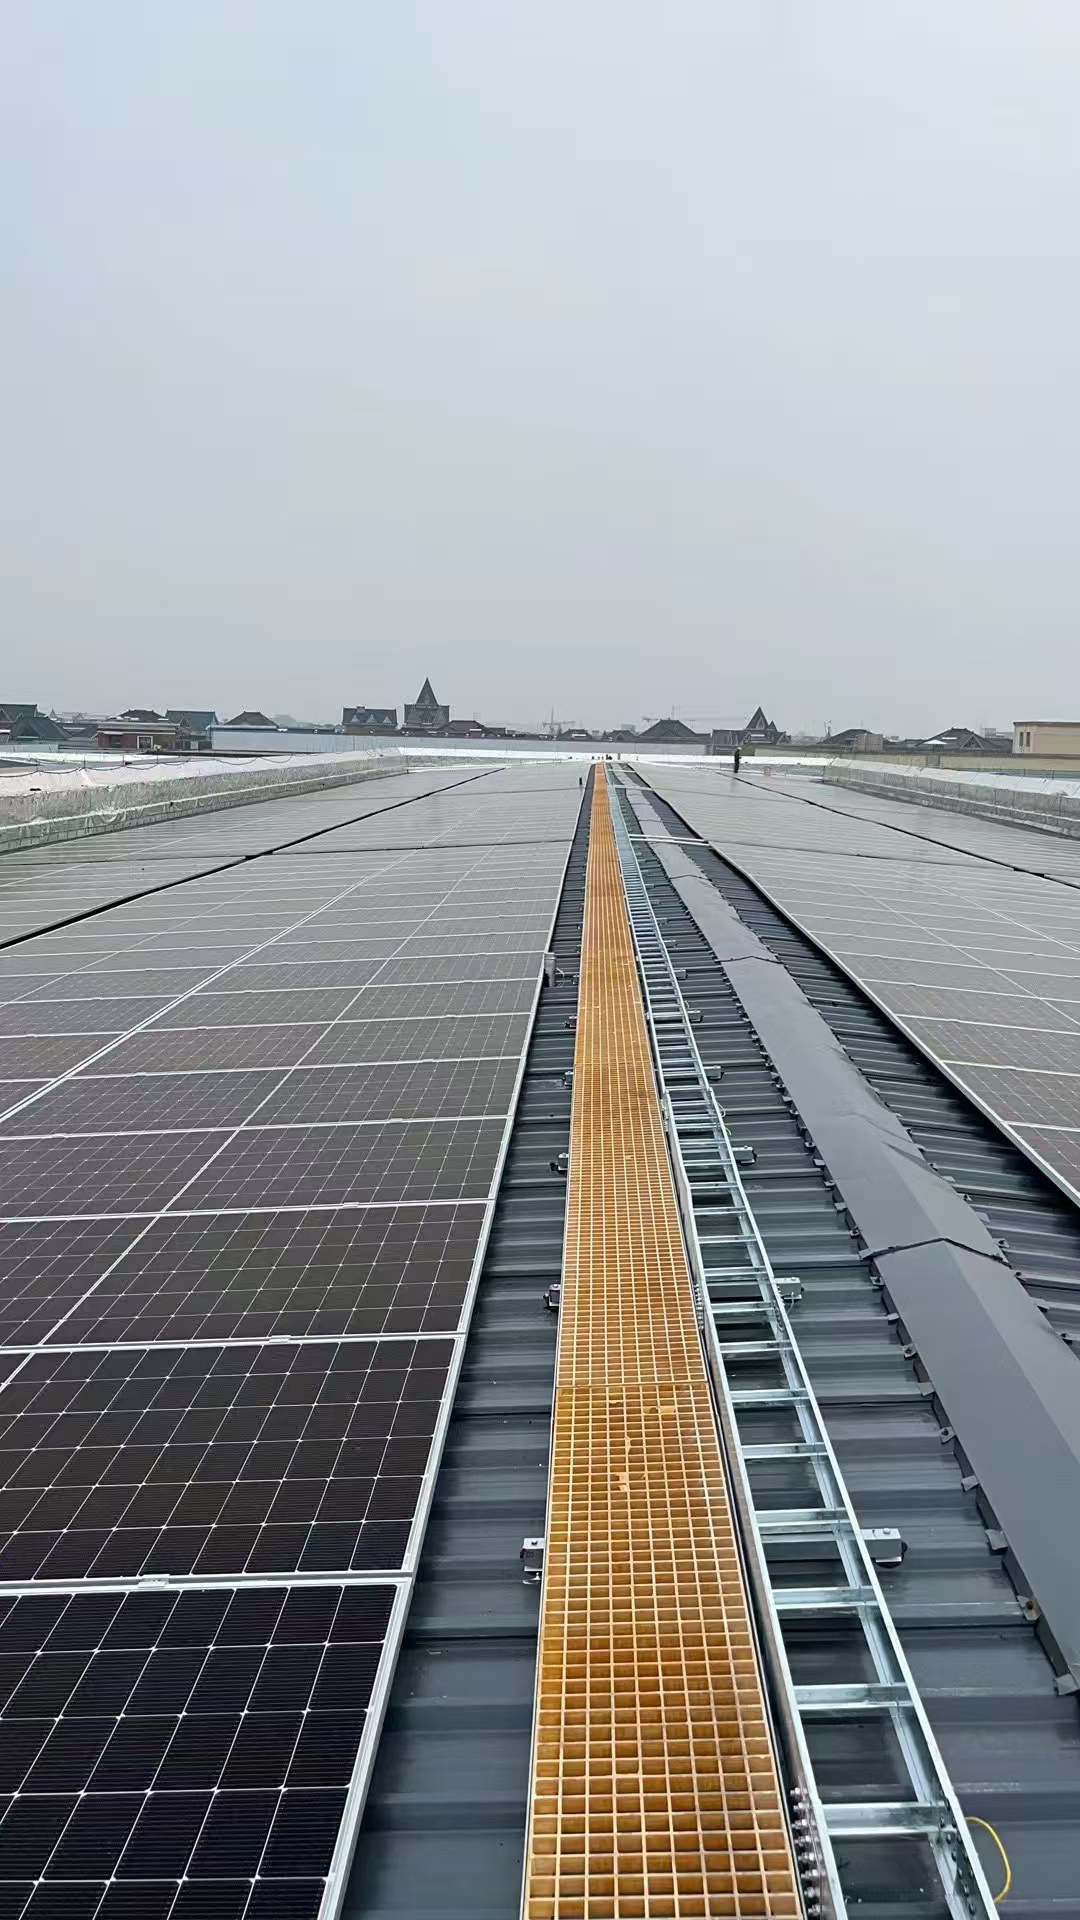
To make an FRP rooftop walkway request reviewable, pair the site photos with a current roof plan and give every straight run, turn and interruption a matching reference. Record what is visible, what was measured, what a project document requires and what is still undecided. A perspective photo can orient the route, but it cannot provide scale or choose the roof support system.
Trace the route before listing panels
Start from the plan revision that the site team currently uses. Mark the proposed access start and destination, then split the path wherever it turns, passes an opening or changes direction around equipment. Give each segment a short reference such as RW-01 or RW-02; those are record labels, not QY panel marks. Show the nearby roof feature that lets another reviewer find the segment again.
Keep the route sketch separate from the product schedule. The sketch answers “where does the access path go?” The panel schedule answers “which pieces are being requested?” Joining them with consistent references lets a buyer or installer trace a panel back to its place without asking a supplier to infer the path from one overview image.
Pair each photo with a place on the plan
The QY image accompanying this article shows a narrow grid walkway running beside rooftop solar modules and other roof features. It is useful as visual context for discussing a route through a crowded roof area. It does not establish the dimensions, support details, fixing method, waterproofing, roof capacity or approval for another site.
For a project photo set, label each view with the route segment it shows and an orientation cue that also appears on the plan. Use one overview to locate the path, then closer views where turns, hatches, drains, curbs, equipment or roof edges affect the route. If a photo cannot be tied to a segment, keep it as general context rather than using it to settle a measurement.
Mark the evidence state beside each input
Use four simple labels in the route register:
| Label | Meaning | Example record |
|---|---|---|
| Visible | The feature can be seen in a referenced photo | Equipment beside RW-02, photo P-03 |
| Measured | A person measured it at the site | Dimension, unit, datum, method and date |
| Documented | It appears in a named current drawing or project note | Document number, revision and callout |
| Open | No reliable value or decision is available yet | Question, responsible confirmer and due point |
Do not convert “visible” into “measured,” or treat an old drawing as current just because its geometry looks similar. When a dimension is measured, record what surfaces or reference points were used. When a project document controls the value, identify that document and revision.
Copy this blank row for each segment or interface:
| Route reference | From / to / turn | Nearby feature | Dimension and evidence state | Open question and owner |
|---|---|---|---|---|
Keep roof-interface decisions with the project team
Route markup helps identify where the FRP grating is being considered; it does not approve how the walkway meets the roof. Keep the support or pedestal arrangement, roof penetrations, membrane or warranty conditions, drainage and structural requirements as separate project inputs. Ask the responsible roof or structural reviewer to define those requirements on the current project documents. Do not infer a non-penetrating system or a fixing detail from the photograph.
Once the interface basis is documented, the supplier can review the requested grating construction, panel dimensions, surface or resin wording, quantities and fabrication references against that scope. QY’s FRP grating product information gives product context; the FRP installation-drawing guide explains how panel marks, supports and openings can be coordinated on a drawing. Neither page replaces the project’s roof or structural approval.
Send a traceable handoff
Provide the current roof plan, route register, matching overview and detail photos, dimensions with units and reference points, requested product description, panel schedule, quantity and destination. Attach the project note that defines any roof-interface requirement. If a support or waterproofing decision is still open, mark it open and name who will confirm it; a quote request should not turn that unknown into an assumed design.
That packet gives procurement, the site team and the supplier one route reference to discuss. For a document-based quotation review, send the marked plan and register to QY.
Related links
Related products and RFQ guides
- FRP grating productsOpen the related product family section.
- FRP grating topic entryFRP grating family page for molded FRP grating, trench covers, car wash grating, tree grates and wet or corrosive access areas.
- FRP trench coversRelated product or guide page.
- FRP grating selection guideRelated product or guide page.
- FRP Grating vs Galvanized Steel Grating for Wet AreasComparison guide for wet or corrosive area grating selection, covering FRP grating and galvanized steel grating by environment, traffic, support, cutouts and quotation details.
- FRP Grating RFQ Checklist for Corrosive and Wet FlooringFRP grating RFQ checklist covering wet or corrosive environment, panel size, support condition, thickness, mesh size, surface, color or resin request, quantity and destination.


